


An icy entrance can disrupt a working day before the first delivery arrives. Preparing your grit supply, treatment routes and snow-clearing equipment helps you respond before staff and visitors encounter slippery surfaces. This guide explains when to grit, where to position grit bins and how to organise snow clearance around the way your business operates.
Why winter site safety matters before the first frost
Entrances, steps, shaded paths and routes between car parks and buildings can become slippery during freezing conditions. Identify these areas before winter and decide who will inspect, treat or restrict access to them.
Winter slip risks continue inside the entrance, where footwear can bring in water and slush. Consider suitable entrance matting, alongside regular cleaning and checks for saturated mats, movement or raised edges.
Employers must assess and manage workplace risks, including slips associated with snow and ice. Occupiers also have responsibilities towards people using their premises. In England and Wales, the Occupiers’ Liability Act 1957 addresses duties towards lawful visitors; the 1984 Act concerns people other than visitors. The applicable legal framework differs elsewhere in the UK.
Start with a practical plan: identify priority routes, allocate responsibility, check equipment and stock, and decide what to do if conditions make an area unsafe to use. Gritting supports that plan, alongside inspections, drainage maintenance and suitable access controls.
How to plan your gritting routine properly
-
Monitor forecasts and local conditions. Check for frost, ice and snow, and inspect surfaces likely to remain wet, shaded or particularly cold. Air temperature alone does not tell you whether a path will freeze.
-
Identify priority routes. Include entrances, steps, ramps, pedestrian routes from parking areas and access needed by early arrivals. Consider how people will reach an alternative route if an area must close.
-
Treat before freezing where practicable. Plan gritting before frost settles and allow time for the salt to work before people arrive. Timing depends on the weather, surface conditions and product instructions.
-
Inspect and re-treat as needed. Rain can wash salt away, and snow or changing conditions can require further action. Base repeat treatment on inspections rather than a fixed timetable.
-
Assign responsibility and cover. Name who checks conditions, who treats each area and who takes over during absence or out-of-hours operation.
-
Record the work and follow-up checks. Note conditions, areas treated, the product used, any closures and further action needed.
When should you grit? Act when frost, ice or snow is forecast, or when wet surfaces are likely to freeze. Salt needs time and moisture to work; spreading it does not make a route immediately safe.
Where should grit bins be positioned?
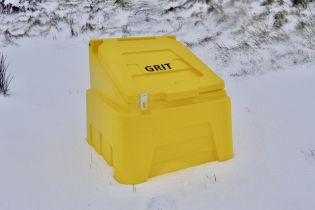
Position grit bins near the areas your team needs to treat, while keeping pedestrian routes, emergency exits, vehicle sightlines and access points clear. Staff should be able to reach the supply without crossing an untreated hazardous area.
Useful locations may include:
-
Near building entrances and the pedestrian routes serving them.
-
Beside car parks, steps and ramps requiring regular treatment.
-
Near loading areas, with safe access away from vehicle movements.
-
On level, stable ground with room to open the lid and handle the contents.
Mark bin locations on your winter plan and tell staff where equipment is stored. If bins are locked, make sure authorised staff can access them before early shifts and during absence cover.
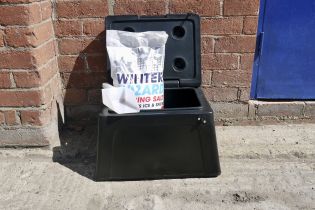
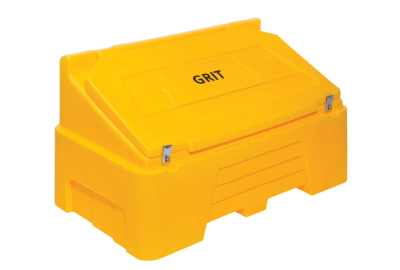
Choosing a grit bin? Compare capacity, external dimensions, lid design and access for filling and scooping. Check whether salt is included or needs ordering separately. A larger site may benefit from several accessible supplies rather than one distant store.
Explore our grit bins, checking capacity, footprint and access for filling against your site’s requirements.
How to clear snow safely without making the surface worse
Clear fresh snow before it becomes compacted where practicable. Plan where the snow will go and how people will move around the work area.
-
Manage access before starting. Direct people towards an inspected alternative route and keep clearance work separate from moving vehicles.
-
Use suitable equipment. Choose a snow shovel or pusher appropriate to the surface and task. Avoid loads that are too heavy to handle safely.
-
Clear priority routes. Start with the routes identified in your winter plan, paying particular attention to steps, ramps and entrances.
-
Keep routes and drainage clear. Place removed snow where it will not obstruct paths, exits, drains or vehicle visibility. Consider where meltwater could run and refreeze.
-
Treat and inspect the cleared surface. Apply a suitable de-icing product according to its instructions, allow time for it to work and check whether further treatment or restricted access is needed.
Do not use water to melt snow or ice: it can refreeze and create a more slippery surface.
Assess the work for manual-handling risks, cold exposure and slips. Provide suitable footwear and clothing, manageable workloads and breaks. Arrange additional equipment or contractor support where the task exceeds your team’s capacity.
Suitable temporary and expandable barriers and warning signs can help manage pedestrian access while clearance takes place. Check stability and suitability for outdoor conditions, position them without introducing trip hazards, and remove temporary warnings.
Winter site inspections: what to check and record
A treatment log helps your team track what has been done, but it does not replace checking whether the measures are working.
Record:
-
Weather and observed surface conditions.
-
Areas inspected, treated or temporarily closed.
-
Treatment times, products used and the person responsible.
-
Follow-up inspections and any further action.
-
Stock shortages, equipment faults and access problems.
-
Reported hazards or near misses and how they were addressed.
Inspect before people arrive and again when conditions change. Tell employees, contractors and visitors which routes to use, and provide an alternative where a route remains unsafe.
Traffic cones, cone toppers and lights can help make temporary warnings and restrictions more noticeable. Keep routes unobstructed and remove warnings when the hazard has passed.
Review recurring icy patches for underlying causes, such as leaking gutters, poor drainage or water running across a path. Repeated gritting alone may not resolve the problem.
Once snow and ice have been removed, check whether steps and ramps need surface repairs or additional grip. Compare anti-slip tapes and surface treatments, checking the individual product’s suitability for outdoor use and the existing surface. These measures do not replace winter treatment.
Choosing equipment for gritting and snow clearance
|
Equipment |
What to check before buying |
|
Grit bins |
Capacity, footprint, lid access, filling arrangements and whether salt is included |
|
De-icing salt |
Intended surfaces, application instructions, storage requirements and compatibility with your spreader |
|
Salt spreaders |
Suitable material and particle size, adjustment, spreading width and access along your routes |
|
Snow shovels and pushers |
Tool weight, handle design, blade width and suitability for the surface |
|
Temporary barriers and warning signs |
Stability, visibility and suitability for the restriction being communicated |
Build a winter prep kit now, so you are not scrambling later
Walk the site before winter, confirm your priority routes and check that equipment is accessible and ready to use. Set stock levels around your treatment needs and supplier lead times, with a named person responsible for replenishment.
Keep the plan proportionate to the site. It should explain when to inspect and treat, who is responsible, what equipment is available and how access will be managed when conditions remain unsafe.
Reviewing your winter equipment? Explore our grit bins, or send our team details of your proposed locations, available space and storage requirements for help comparing suitable options.
Frequently Asked Questions
Does gritting work after ice has formed?
Salt can help melt existing ice, but it does not work instantly. Compacted snow and ice can be difficult to treat, so clearance, repeat inspection and temporary access restrictions may also be needed.
How much salt should a business keep?
Base stock on the area being treated, the product’s recommended application rate, likely repeat treatments and replenishment lead time. Set a reorder level and check supplies throughout winter.
Can you use hot water to clear icy paths?
Avoid using hot or cold water to clear snow and ice because it can refreeze. Clear snow with suitable equipment and apply an appropriate treatment.